After reading the Python tutorial so far, you should have a basic understanding of Python and the REPL. Even though the latter can be very useful, you probably noticed in the last example that the REPL has its limits. It’s nice for quick experiments, but:
- It’s really hard to enter more than a few lines
- It’s hard to go back to previous lines
- There’s no syntax highlighting
- We can’t store our programs and re-use them later on
If we want to store our programs and use a decent editor, we need to simply:
- create a file,
- enter the code in that file,
- save it,
- … and execute it!
“Wait, what? How!”
No worries, we’ll go over it step by step.
Table of Contents
1. Create a Python file
We need to create a so-called plain text file, meaning there’s nothing special about this file. It’s just text. Sounds simple, but it’s not. For example, if you start Word or a similar program, enter some text, and save it, you don’t end up with plain text.
Text processing software like Word will add all kinds of extra codes to define the markup, allow for images to be included, etcetera. It looks a little like HTML, in fact, which is used to create websites (see this HTML tutorial for an introduction).
So what should we use?
If you’re on Windows, try Notepad. It’s a plain text editor that does not add any markup. It’s a horrible way to create Python programs, but we’ll explore better options later on.
If you’re on Linux, you could open a terminal and try a text editor like nano or vim (the last one is hard to use if you haven’t read the manual, though). Many Linux installations include a GUI text editor too, like gedit.
MacOS, surpringly, doesn’t come with a plain text editor anymore. To follow along with this page, I recommend you to download cotEditor. It’s free and open-source, and will come in handy when you need to have a quick look at any text file in the future.
2. Enter the code
Now it’s time to enter some code. We’ll keep it super simple for now. Just enter something like:
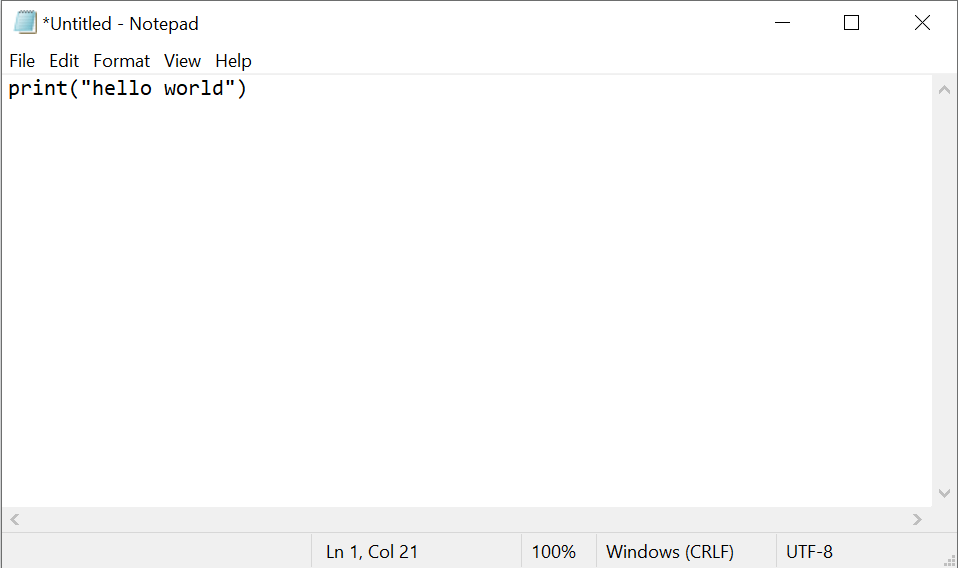
print("Hello world")Code language: Python (python)On Windows, it should look like this:

3. Save the file
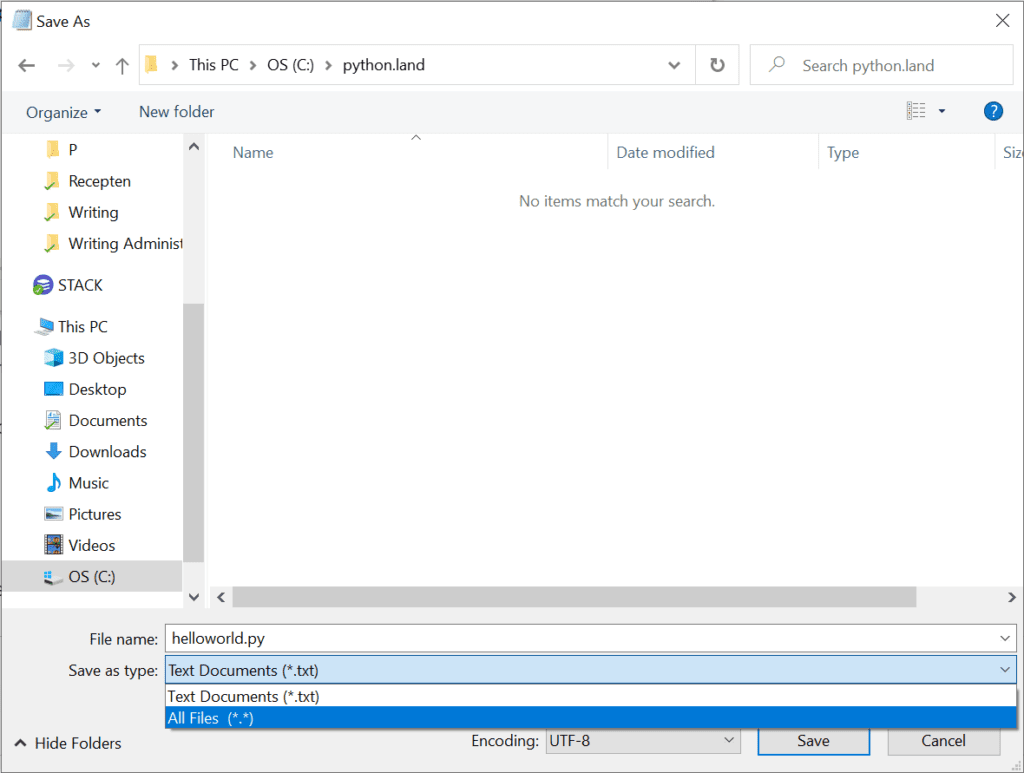
Save the file. The most important thing to look out for is the file extension. Python files end with the .py extension. Call your file helloworld.py. In Notepad, you need to click the dropdown list called ‘Save as type’ and select All files (*.*):

4. Execute a Python program file
Now that you saved the file, we can execute it. There are two options, and most often you want to go for option one:
- Open a terminal or command prompt, go to the file’s directory, and execute it with the
python3command - Find the file with Windows explorer, right click, open with ‘Python 3.X’.
If you try option two, you’ll find out that the program flashes on the screen shortly, and you won’t see the output because the window closes itself directly after the text is printed to the screen. So now you know why you want option one! If you create more advanced programs that keep running instead of quitting directly, option two can be an OK way to start a Python script.
Note: I’ll demonstrate using Windows, but this works the same on Linux and MacOS. Instead of opening a Command Prompt or Windows Terminal, you open a MacOS terminal or Linux terminal.
- Open the start menu and type ‘Command Prompt.’ It might be named differently if your OS is configured with another language than English. Hint: Create a new profile with English settings. It may be helpful because most examples on the web and in books assume English settings.
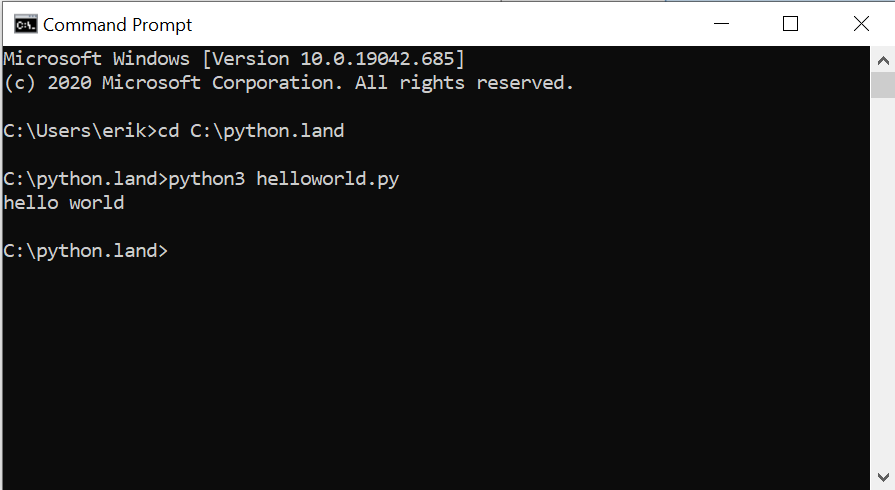
cdto the directory where you stored your file. In my case, it’sC:\python.land- Run the program with the command
python3 helloworld.py
The output should look like this:

Congrats, You did it. You wrote a Python program, saved it to a file, and executed it like a boss! Don’t celebrate too hard, though. You don’t want to develop Python software using Notepad or other simple text editors. What you really want is a Python IDE: an Integrated Development Environment. Sounds scary, but it’s not!


